Imagine unlocking a time capsule of memories by bringing old, faded photographs back to life. In the digital age, restoring old pictures has become an accessible and rewarding endeavor, thanks to the powerful tools provided by Adobe Photoshop. In this guide, we’ll explore step-by-step how to restore old pictures with Photoshop, from understanding the basics to advanced techniques that breathe new life into cherished memories.
Introduction
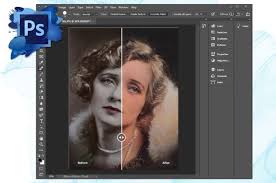
Preserving the past is not just about nostalgia; it’s a way of connecting with our roots. Old pictures carry the essence of bygone eras, and their restoration ensures that these moments remain vivid for generations to come. One of the most effective tools for this task is Adobe Photoshop, a versatile software known for its photo-editing capabilities.
Understanding the Basics of Photoshop
Before diving into the restoration process, it’s crucial to familiarize yourself with the basic tools and features of Photoshop. From the Healing Brush to layers, understanding these fundamentals lays the groundwork for a successful restoration journey. Additionally, recognizing compatible file formats ensures smooth integration with Photoshop.
Assessing the Condition of Old Pictures
Old pictures often suffer from scratches, fading, and discoloration. Identifying these issues and gauging the level of damage is a critical step. This assessment guides the restoration process, helping you prioritize and address the most pressing concerns first.
Setting Up Your Workspace in Photoshop
Creating an optimal workspace is key to an efficient restoration process. From starting a new project to adjusting settings, this section provides a step-by-step guide to ensure your Photoshop environment is tailored to the restoration task at hand.
Basic Restoration Techniques
Get ready to roll up your sleeves and dive into basic restoration techniques. Discover how to remove scratches, blemishes, and enhance overall picture quality using the Healing Brush tool. Adjusting brightness and contrast will bring clarity to your images.
Advanced Restoration Methods
As your confidence grows, explore advanced methods such as the Clone Stamp tool and non-destructive editing with layers. These techniques allow for more detailed corrections and offer greater control over the restoration process.
Color Correction and Enhancement
Colors can fade over time, robbing old pictures of their vibrancy. Learn how to restore the original color palette and enhance overall image quality through precise color correction techniques. Apply a Photo Filter adjustment layer to modify color while preserving the original image. Open an image in Photoshop. Then, click the Adjustment Layer icon in the Layers panel and choose Photo Filter.
Preserving Details and Texture
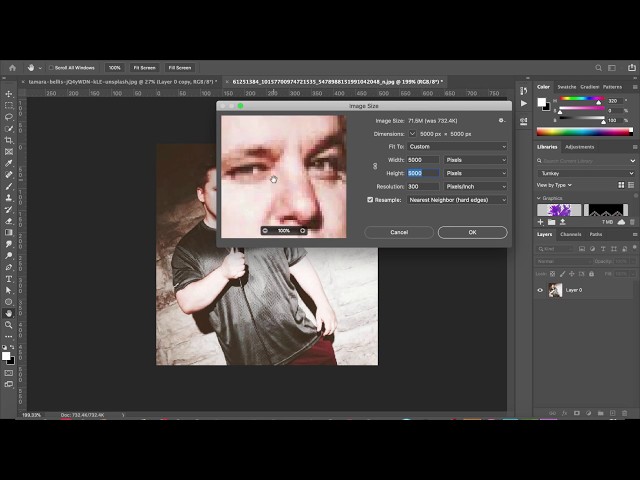
Delve into the nuances of preserving details and texture during the restoration process. Avoiding over-editing ensures that the unique character of each photograph remains intact. You need to ensure it is enabled in your Photoshop preferences. This can be done by going to the Edit menu (Windows PC) or the Photoshop CC menu (Mac), selecting Preferences, and then Technology Previews. Make sure that “Enable Preserve Details 2.0 Upscale” is turned on before proceeding.
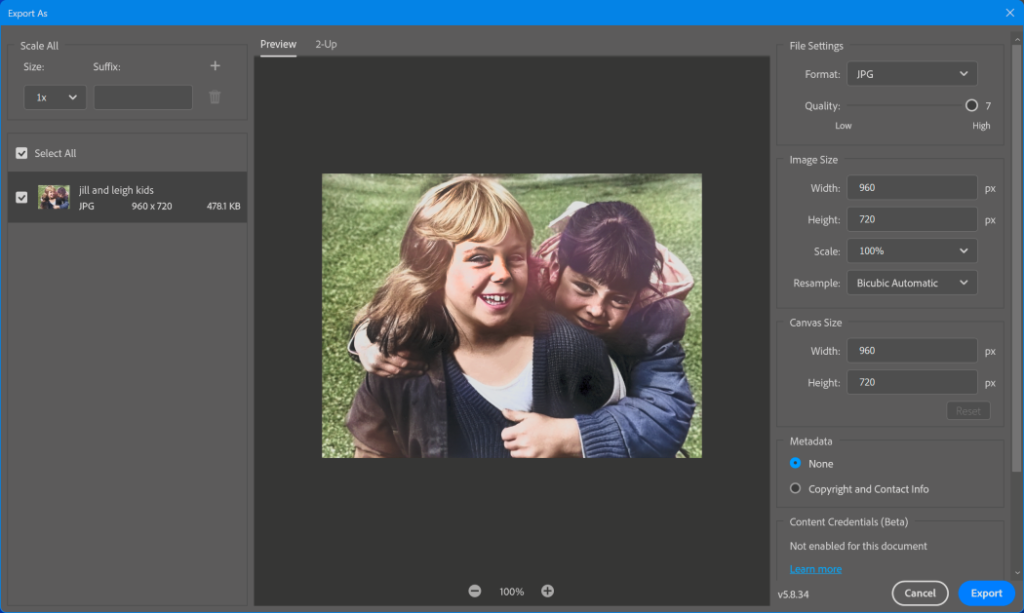
Exporting the Restored Image
Once your restoration is complete, it’s time to save and export the final image. Navigate through the options, choose the right file format, and store your restored pictures securely for future enjoyment.
- Ensure your image looks the way you want.
- Use the Marquee Tool or any selection tool to choose the area to export.
- Go to “File” in the top menu.
- Choose “Export” or “Save As.”
- Select the desired format (JPEG, PNG, etc.).
- Adjust quality settings if needed.
- Choose the destination folder.
- Click “Export” or “Save.”
- Enter a file name and select the folder.
- Click “Save” or “Export.”
Showcasing Your Restored Pictures
With your newly restored pictures in hand, explore various options for sharing and displaying your work. Efficiency is the key to a seamless restoration experience. Discover time-saving strategies that balance speed and precision, making the restoration process not only effective but also enjoyable. Whether creating a portfolio or sharing on social media, find the best ways to showcase your restoration skills.
Benefits of Learning Picture Restoration
No journey is without challenges. This section addresses common issues like color mismatches and pixelation, offering practical solutions to keep your restoration process smooth. Beyond personal satisfaction, the guide explores the potential career opportunities in photo restoration. Discover the fulfillment that comes from preserving history and the skills that could open doors to a new profession.
Click here to read about HDMI vs. DisplayPort
Conclusion
In conclusion, restoring old pictures with Photoshop is a journey that goes beyond pixels and brushes. It’s about reviving memories, connecting with the past, and leaving a lasting legacy. Armed with the knowledge gained from this guide, readers are encouraged to embark on their restoration adventure.
Frequently Asked Questions
1. How long does it take to learn picture restoration on Photoshop?
Learning picture restoration on Photoshop varies based on individual dedication and the complexity of the restoration. With consistent practice, one can grasp the basics within a few weeks.
2. Can I use Photoshop alternatives for picture restoration?
While Photoshop is the industry standard, some alternatives offer photo-restoration features. However, the specific tools and capabilities may differ, so it’s recommended to use software designed for image restoration.
3. Are there online courses available for advanced Photoshop restoration?
Yes, numerous online platforms offer courses in advanced Photoshop restoration. These courses provide in-depth knowledge and hands-on experience to refine your restoration skills.
4. What precautions should I take when restoring valuable or fragile pictures?
Handle valuable or fragile pictures with care, and consider consulting with professionals for delicate restoration projects. Make sure to work in a clean environment and use archival materials for storage.
5. How can I find high-quality scanned versions of old pictures for restoration?
Look for high-quality scanned versions in digital archives, libraries, or family collections. Ensure the scanned images are in a compatible format for Photoshop before beginning the restoration process.